Fun fact: this recipe was initially going to be included in my cookbook, but got cut because it doesn’t require baking (it is a baking cookbook after all). I was looking over those recipes for some inspiration, and I was reminded how much I loved these rice treats. I hadn’t made them since the testing phase five years ago, and as a busy mom, I now see their “no-bake” element as a good thing!
Other reasons why I love these rice treats:
Under 10 ingredients
Sweet + salty + crunchy
Hints of chocolate with every bite
A major upgrade from traditional Rice Krispie Treats

Planning and prep
This recipe is short and sweet (literally and figuratively!). Patience is only required during refrigeration when the treats need to be chilled – about 4 to 6 hours. You could allow the treats to set in the freezer to expedite this step, but I haven’t tried it so don’t quote me on that. Early in the process, you do need to let the nut butter mixture cool slightly for about 15 minutes before adding the other ingredients, but this is nothing. If you make the treats earlier in the day, they will be ready to satisfy your after-dinner sweet tooth.
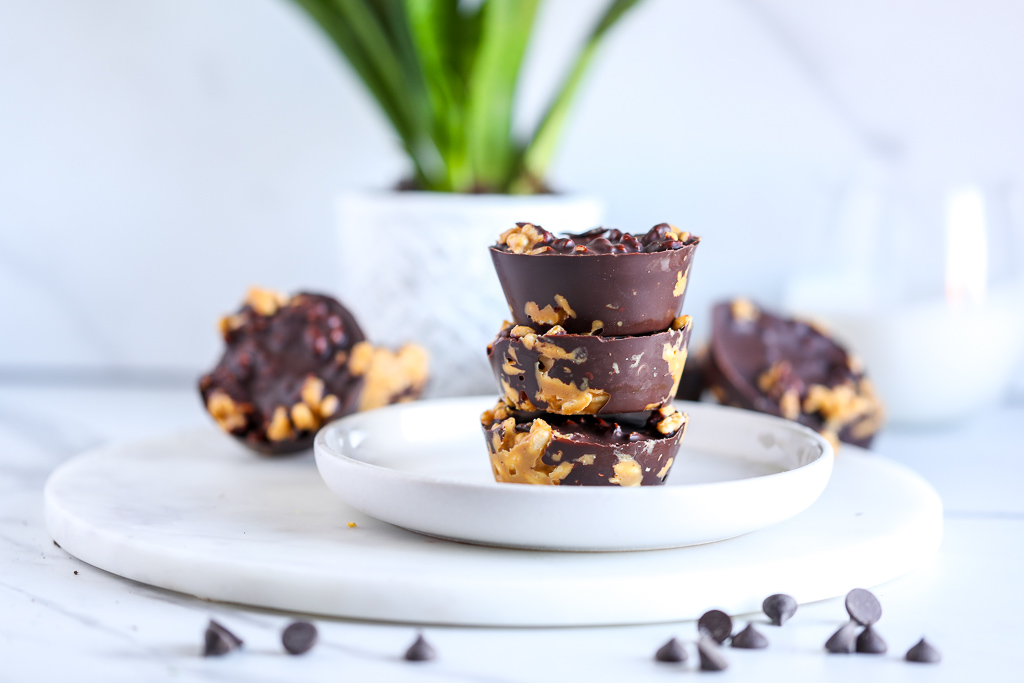
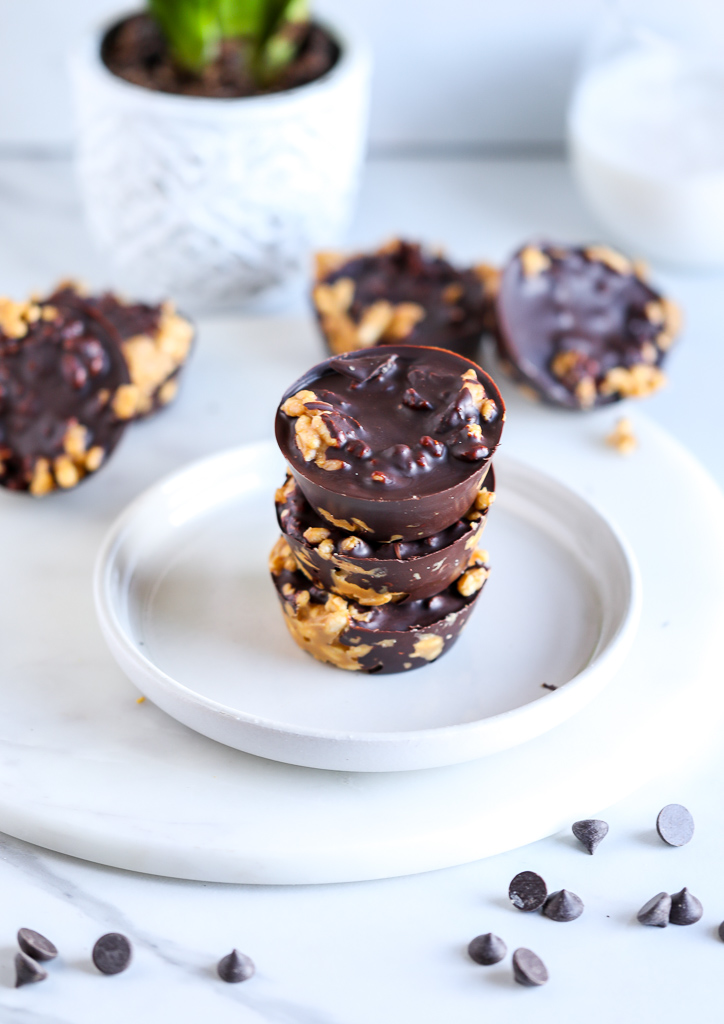
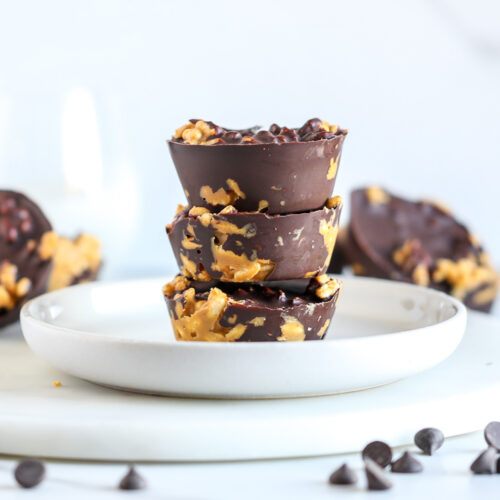
The recipe does call for making the treats in an 8×8 baking tin, and then slicing them into squares. I prefer to use this silicone muffin mold, which allows for easy removal and perfect portions. Either way, it’s up to you!
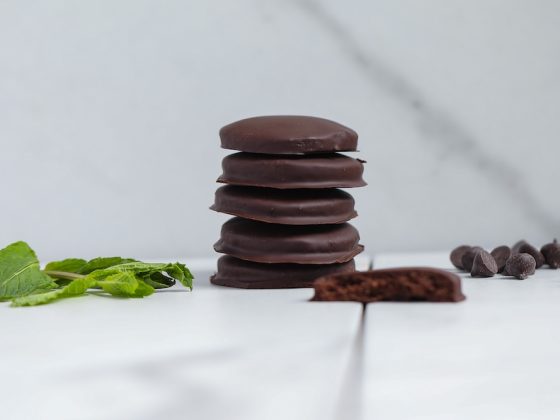
Chocolate-Covered Rice Treats {Gluten-Free, Vegan}
Equipment
- Small saucepan
- 8×8 baking tin or silicone muffin mold
Ingredients
For the rice treats
- 1 cup unsweetened cashew butter nut butter, or peanut butter
- ¼ cup coconut oil soft or melted
- ¼ cup maple syrup
- 1 teaspoon vanilla extract
- ¼ teaspoon sea salt omit if your nut butter has salt
- 2 cups puffed rice cereal
For the chocolate coating
- 1 cup dairy-free chocolate chips or chopped dark chocolate
- 2 tablespoons coconut oil melted or soft
- Sea salt for sprinkling (optional)
Instructions
- Coat an 8-by-8-inch baking tin with cooking spray and line with parchment paper, leaving an inch overhang on two sides.
- In a small saucepan over medium-low heat, combine the nut butter and coconut oil. Whisk to combine until blended and creamy, and no nut butter clumps remain, about 5 to 7 minutes. Remove from heat and allow the mixture to cool for 15 minutes.
- Meanwhile, place the puffed rice cereal in a large bowl.
- Once cooled, add the maple syrup, vanilla extract, and salt (if using) to the nut butter mixture and stir to combine. The maple syrup will thicken the mixture, so stir and transfer quickly to the bowl with the rice cereal.
- Stir until the rice cereal is fully coated with the nut butter mixture. Use the back of a spatula to press it firmly into the bottom of the pan until even.
- To make the chocolate coating (if using), combine the chocolate chips and coconut oil in a microwaveable safe bowl. Microwave for 1 minute, then stir until creamy fully melted.
- Pour the chocolate mixture over the rice treats until the top is mostly covered. Sprinkle with the sea salt (if using). Place the pan in the refrigerator to set for at least 4 o 6 hours. Remove the contents from the pan and slice into squares.