Valentine’s Day is on Friday!
What better way to celebrate the day of (self) love than with lots of chocolatey treats? Luckily for us, there are recipes that can curb your sweet tooth in a more beneficial way. Here are a few grain-free, more blood sugar balancing recipes that will be sure to make your Valentine’s (or Galentine’s) Day that much better!
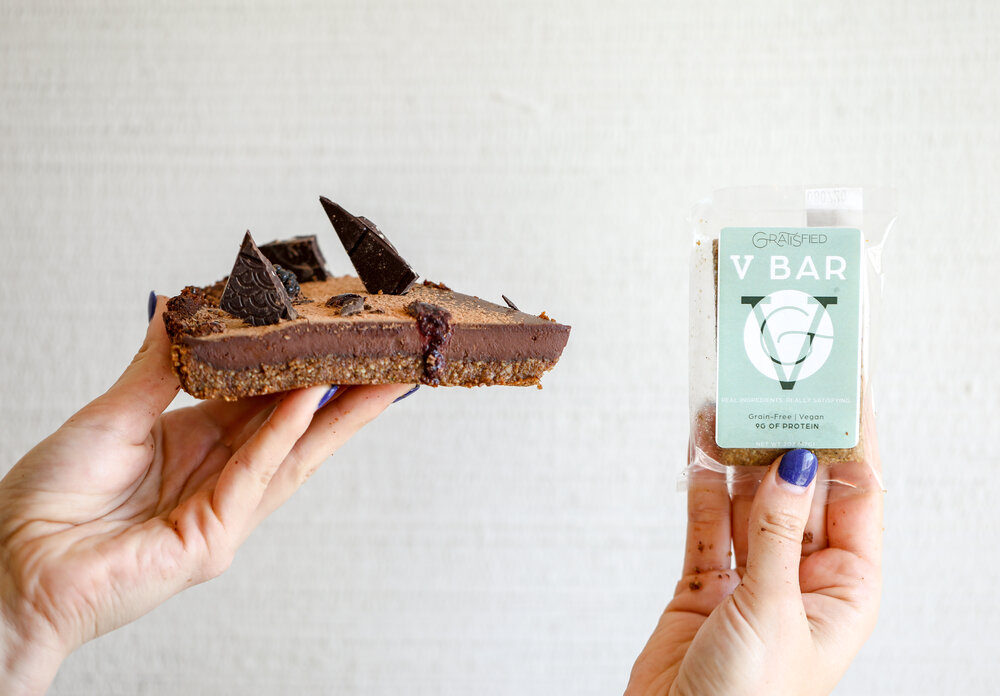
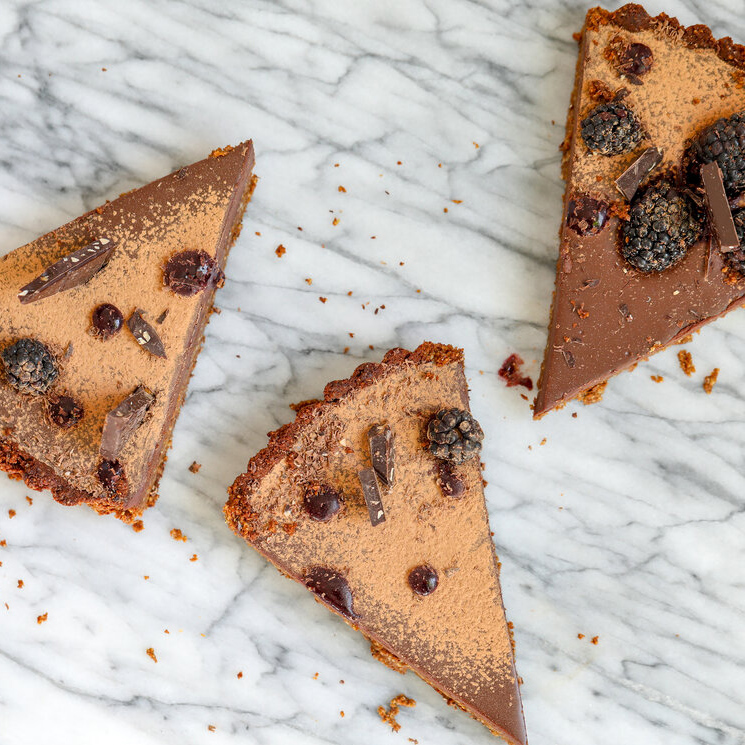
Dark Chocolate Tart with V Bar Crust
Ingredients
For the V Bar Crumble Crust
- 2 cups crushed V Bars
- ¼ cup melted coconut oil
- 3 tablespoons cacao powder
For the Tart
- 2¼ cups vegan dark chocolate
- 1 can full-fat coconut milk
- 1 teaspoon vanilla bean paste (vanilla extract would work too)
Optional Blackberry Coulis
- 2 cups blackberries
- 1 teaspoon lemon juice
- 2 tablespoons coconut sugar
Instructions
For the Crust
- In a food processor, pulse the vegan bars until sand-like consistency.
- Add the 3 tablespoons of cacao powder and the 1/4 cup melted coconut oil, pulse again until mixture pulls away from the sides.
- Press the mixture into a pie pan or a tart tin.
- Bake at 400 for 10 minutes. Then allow to cool.
For the Tart
- Bring coconut milk to a light boil, then pour over chocolate, covering it completely.
- Let it stand for five minutes.
- Gently stir together and add the vanilla bean paste or extract.
- Pour into prepared crust.
For the optional Blackberry Coulis
- In a food processor, blend together blackberries, lemon juice and coconut sugar until well combined.
- Push the mixture through a fine mesh sieve (or fine strainer).
- Place in refrigerator until ready to use.
Notes
*Garnish with cacao powder, shave chocolate, shards of chocolate and fresh blackberries if desired
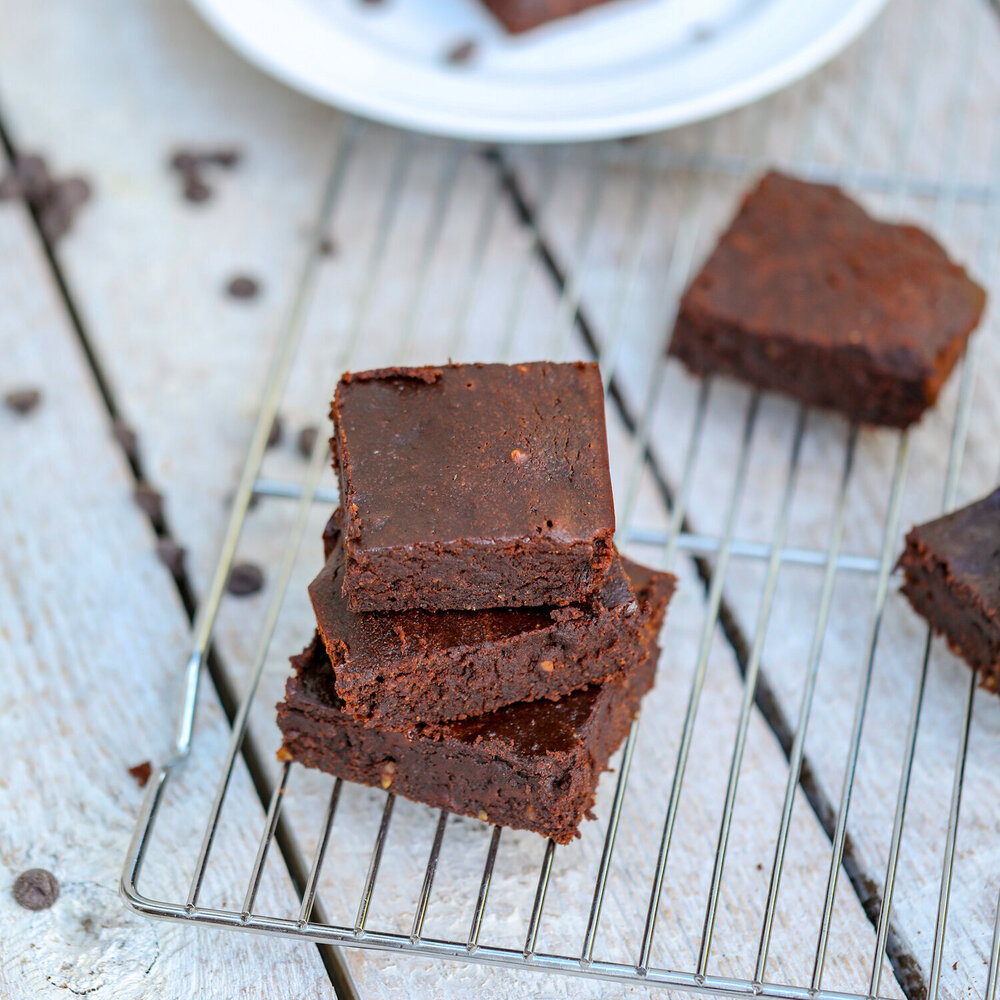
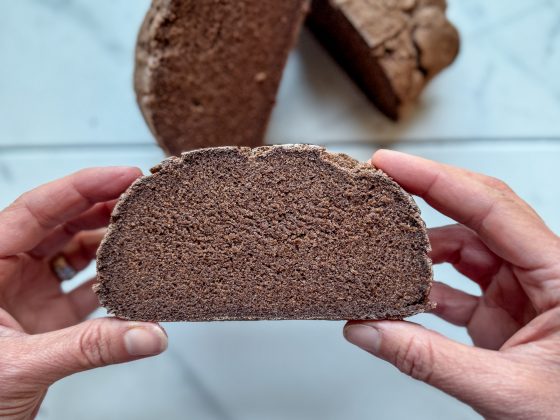
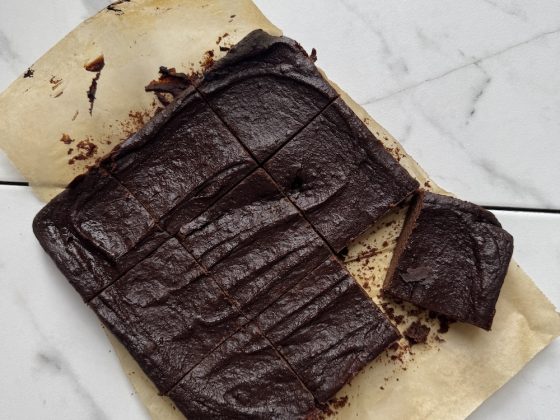
Nut Butter Fudgy Brownies
Equipment
- Cookie Sheet
- 8-by-8-inch baking dish
- hand mixer or stand mixer
Ingredients
- 1 cup almond flour
- ¾ cup coconut sugar
- ½ cup unsweetened cocoa powder or raw cacao powder
- ¼ cup tapioca flour
- ½ teaspoon baking powder
- ¼ teaspoon sea salt
- 1 egg, beaten
- ½ cup full-fat coconut milk or unsweetened almond milk
- ⅓ cup pumpkin puree
- ⅓ cup peanut butter or almond butter (I used peanut butter)
- ⅓ cup coconut nectar or maple syrup
- 1 teaspoon vanilla extract
- ½ cup dairy-free chocolate chips (I like Enjoy Life brand)
Instructions
- Preheat the oven to 350°F. Spray an 8-by-8-inch baking dish with cooking spray or line it with parchment paper.
- In a large bowl or stand mixer, mix the almond flour, coconut sugar, cocoa powder, tapioca flour, baking powder, and salt. Stir until blended.
- In a medium bowl, mix the egg, coconut milk or unsweetened almond milk, pumpkin puree, peanut butter or almond butter, coconut nectar or maple syrup, and vanilla. Whisk until creamy.
- Pour the wet mixture into the bowl with the dry ingredients and start beating on medium speed, increasing the speed as needed, until a batter is formed. Add the dairy-free chocolate chips if using blend again. Transfer the batter to a baking dish.
- Bake for 27 to 30 minutes until the edges have started to crust and pull away from the edges of the baking pan (the middle will still “jiggle” and appear darker and undercooked, but it will set as it cools). Allow the brownies to cool completely in the baking dish, about 2 hours.
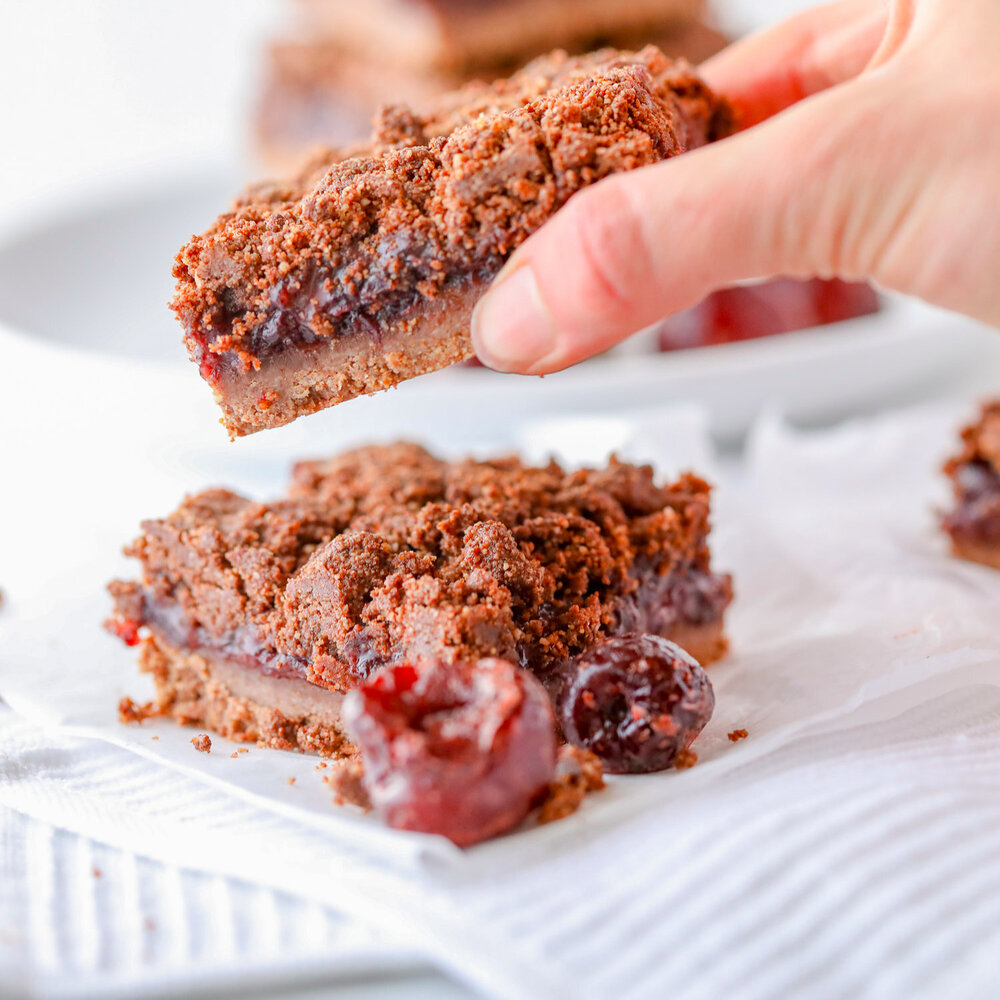
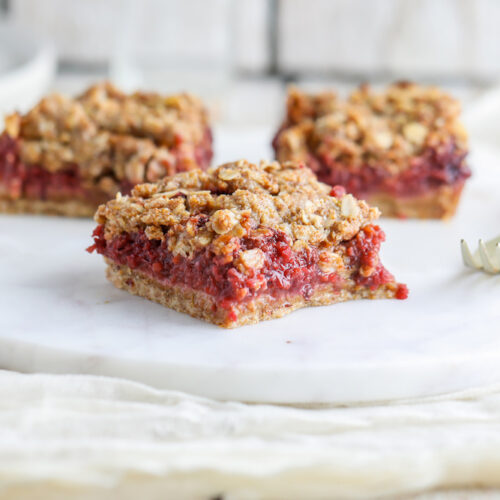
Cardamom Plum Crumble Bars {Gluten-Free, Vegan}
These gooey crumble bars are a great baked good for summer celebrations! Pair with your favorite yogurt for breakfast, enjoy as a snack, or top with ice cream for a dessert. Gluten-Free and vegan.
Equipment
- Food processor
- hand mixer or stand mixer
- 8×8 baking pan
Ingredients
For the Crust
- 1¼ cups almond flour
- ¼ cup coconut sugar
- 2 tablespoons tapioca flour or arrowroot starch
- ⅓ cup melted coconut oil
For the Filling
- 5 plums, pits removed and quartered (equals about 5 cups)
- ⅓ cup coconut sugar
- 1 teaspoon cardamom optional
- 1 teaspoon vanilla extract
- 2 tablespoons arrowroot starch
For the Crumble Topping
- 1/2 cup rolled oats gluten-free if necessary
- 1/2 cup almond flour
- 1/3 cup coconut sugar
- 3/4 cup cold vegan butter or grass-fed butter cut into 1-inch pieces
Instructions
- Preheat the oven to 350° F. Grease an 8×8 baking pan and line with parchment paper.
- Make the crust. In a large bowl or stand-up mixer, combine the almond flour, coconut sugar, and tapioca flour or arrowroot starch. Stir to blend. Start beating on medium speed, slowly incorporating the melted coconut oil, increasing the speed and continuing to beat until a crumbly dough is formed. Gather the dough and press it firmly in the bottom of the baking pan (it should feel like damp, course sand and should stay compact when you squeeze it). Prebake the crust for 10 minutes, then set aside until ready to use.
- Meanwhile, make the filling. In a food processor, combine the plums, coconut sugar, cardamom, and vanilla extract and blend until almost pureed. Add the arrowroot starch and process again, scraping down the sides as you need to until everything is incorporated.
- Transfer the plum mixture to the baking pan with the pre-baked crust, using a spatula to spread evenly to all sides.
- Make the crumble. In a medium bowl, combine the oats, almond flour, and coconut sugar. Stir to blend. Add the vegan butter and use your hands to “massage” it into the oat mixture until a crumbly dough is formed. Sprinkle the crumble evenly over the cherry mixture.
- Bake for 30 minutes until crumble is crisp to the touch and plum filling mixture is bubbling. Allow the bars to completely cool at room temperature (about 2 hours) before transferring to the refrigerator for at least 4-6 hours (or ideally overnight) to completely set*.
Notes
*If they aren’t able to completely cool and set in the fridge, they will fall apart. The consistency is gooey, so I suggest eating with a spoon or fork.
Storage: keep crumble bars in the refrigerator for up to 1 week. Wrap individual crumble bars in plastic wrap for longer storage. You can also freeze them for up to 3 months.
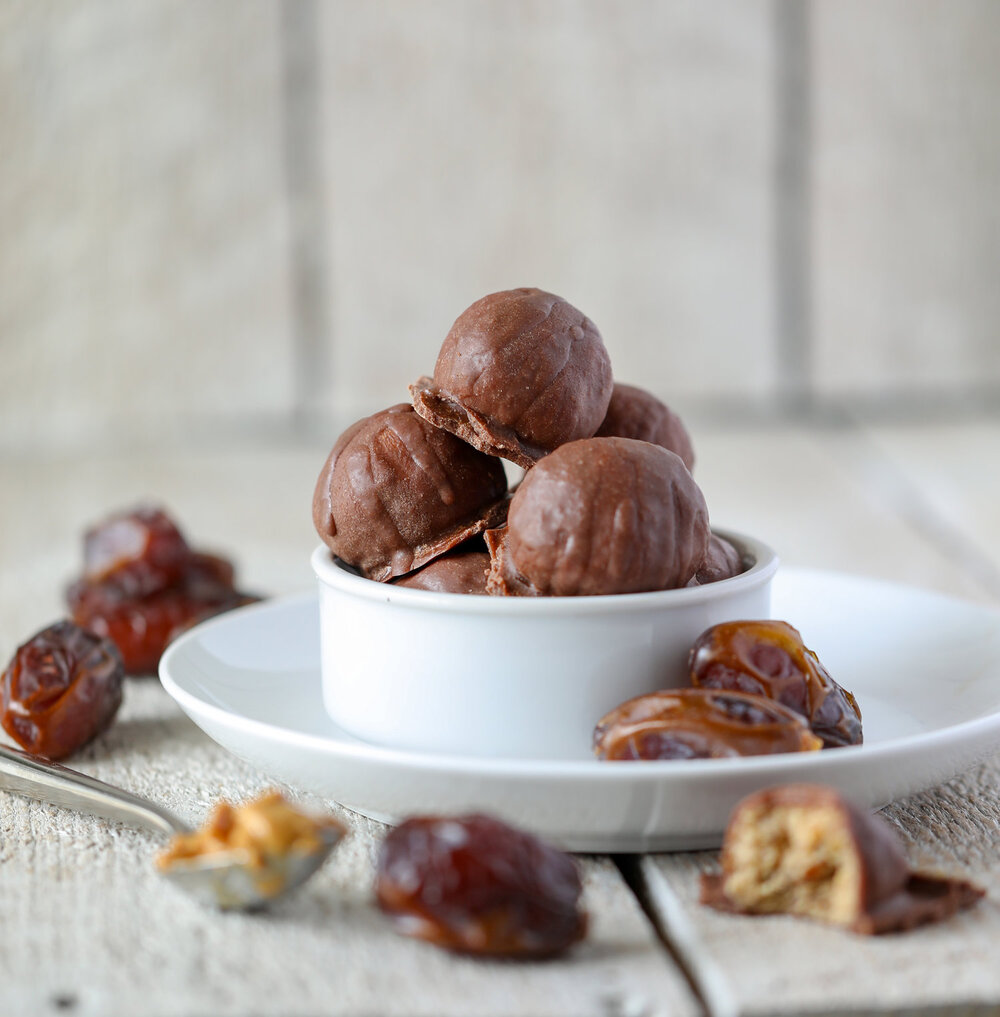
Chocolate Covered Energy Bites
Ingredients
For the Energy Bites
- 2 cups raw nuts of choice (I suggest almonds or walnuts)
- 12 – 14 Medjool dates, pits removed
- ⅓ cup all-natural creamy peanut butter
- 2 tablespoons melted coconut oil
For the Chocolate Coating
- 1 cup coconut butter
- ¼ cup coconut oil (can be room temperature)
- 2 tablespoons raw cacao powder
- 1 tablespoon maple syrup
Instructions
Making the Energy Bites
- Place the raw nuts in a food processor and blend until the consistency of course sand (about 20 seconds).
- Add the dates and peanut butter, and blend again.
- While processing, add the melted coconut oil, and continue to blend until a sticky dough is formed.
- Form energy bites into balls of desired size and place on a cutting board or cookie sheet. Transfer to the refrigerator for 2 hours to chill.
Making the Chocolate Coating
- While Energy Bites are chilling, place the coconut butter and coconut oil in a small saucepan over the lowest heat. Cook for about 3 minutes until it has melted and become creamy.
- Add the raw cacao powder and stir until blended.
- Remove from heat and transfer to a separate medium bowl. Add the maple syrup and whisk (it might cause the mixture to slightly thicken).
Putting it all Together
- Dip the energy bites into the coating mixture and place on a cutting board or cookie sheet. Do this until all of the coating mixture is used up, which might take 2 to 3 coats. Transfer back to the refrigerator to set. Store in the fridge.
Notes
*Prep Tip: At least 30 minutes before coating the energy bites, transfer them to the freezer so they are cold and the coating will set faster.
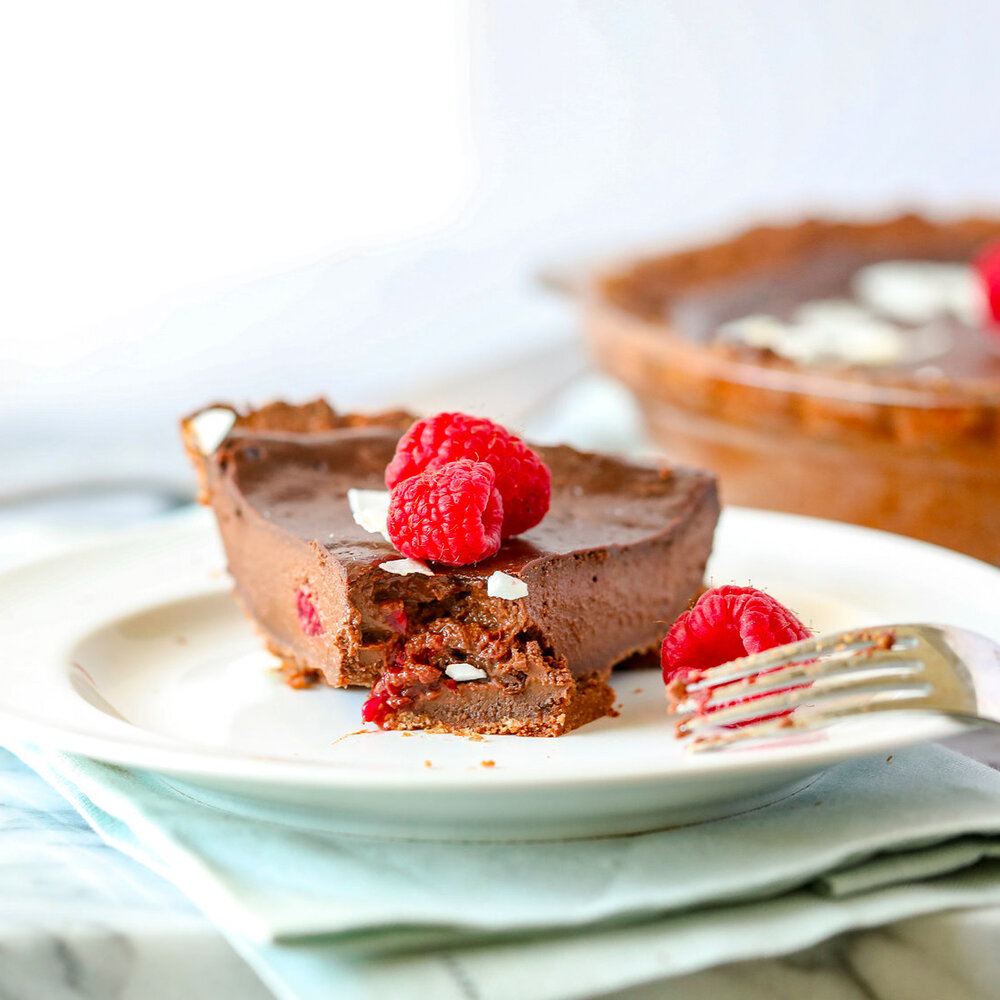
Chocolate-Raspberry Pie
Ingredients
For the Crust
- 1¾ cups almond flour
- 2 tablespoons tapioca flour or arrowroot starch
- 2 tablespoons coconut sugar
- 2 tablespoons unsweetened cocoa powder or raw cacao powder
- ¼ teaspoon sea salt
- ¼ cup maple syrup
- ¼ cup melted coconut oil
- 1 teaspoon vanilla extract
For the Filling
- 1 cup dairy-free chocolate chips (I suggest Enjoy Life brand)
- 3 tablespoons coconut oil
- 1 cup full-fat coconut milk
- ¼ cup maple syrup
- 1 ripe banana, mashed
- ¼ cup mashed ripe avocado (equals about 1/2 medium avocado)
- ⅓ cup unsweetened cocoa powder or raw cacao powder
- ¼ cup coconut sugar
- ¼ cup arrowroot starch
- ½ teaspoon baking powder
- 1 teaspoon vanilla extract
- ¼ teaspoon sea salt
- 1 – 1½ cups fresh raspberries (plus more for topping if desired)
Instructions
- Make the crust. In a large bowl or stand-up mixer, combine the almond flour, tapioca flour or arrowroot starch, coconut sugar, cocoa powder or raw cacao powder, and sea salt. Stir to blend.
- In a separate bowl, combine the maple syrup, melted coconut oil, and vanilla extract. Whisk.
- Pour the wet ingredients into the bowl with the flour mixture. Beat until a dough is formed. Gather the dough into a ball and wrap tightly in plastic wrap. Refrigerate for 30 minutes.
- Preheat the oven to 350° F. Heavily grease a 9-inch pie plate with cooking spray or oil of choice
- Place the ball of dough between two sheets of parchment paper. Using a rolling pin, roll the dough until about ¼-inch thick. Flip it onto the pie plate, and carefully press it into the bottom and up the sides. Place the pie plate back in the refrigerator until ready to use.
- Make the filling. In a small saucepan over medium heat, combine the chocolate chips and coconut oil. Heat until melted, about 2 to 3 minutes, stirring frequently (careful not to let it burn). Remove from heat.
- In a high-speed blender or food processor, combine the coconut milk, melted chocolate mixture, maple syrup, banana, mashed avocado, coconut sugar, cocoa powder or raw cacao powder, arrowroot starch, baking powder, vanilla extract, and sea salt. Blend until creamy.
- Evenly place the raspberries on the crust in the pie plate. Pour the chocolate mixture on top, using a spatula to spread everything evenly so that the mixture reaches the sides.
- Bake for 45 minutes or until the filling looks like it has formed a thin crust and a toothpick comes out clean (it may look like it has risen too high, but it will come down and set as it cools). Allow the pie to completely cool in the pie plate at room temperature (about 2 hours) before transferring to the refrigerator for at least 4 to 6 hours (or ideally overnight) to completely set.
Notes
*I have not tried this recipe with frozen raspberries, but I am sure it would work
*Storage: Pie will keep lightly covered with tin foil in the refrigerator for up to 4 or 5 days.
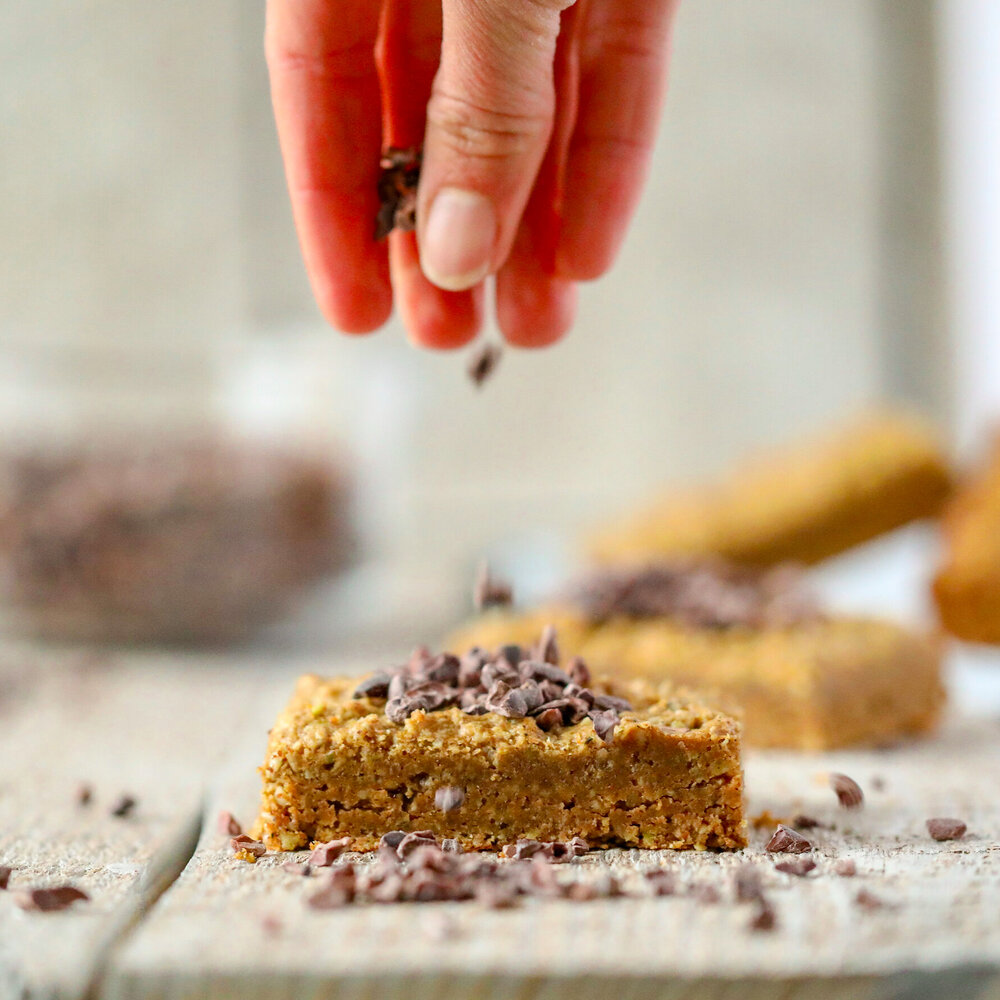
I hope one of these sweet treats will brighten your Valentine’s Day! Don’t have time to bake this year? Empower Bars with your favorite nut butter spread on top makes for an easy and delicious treat too! Stay tuned for a blog post soon on more ways to dress up your bars in the future!
XO,
Sara