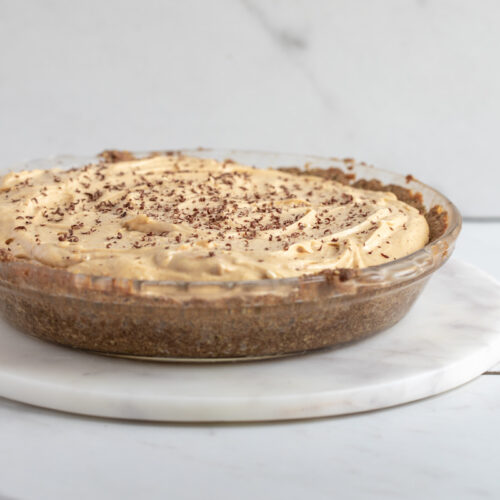
Peanut Butter Pie {Grain-Free}
This pie recipe is a Healthified trifecta! A Gratisfied grain-free crust is layered with fudgy chocolate made with cottage cheese for extra protein, and topped with a whipped peanut butter cream cheese filling. More blood sugar balancing sweeteners make this pie more metabolically friendly. This dessert is grain-free and low carb.
Equipment
- Blender
- Hand blender or beater
- Pie plate
- Mixing bowls
Ingredients
For the pie crust
- 1 Empower Bar Original baking mix pouch see note
- 1/2 cup melted coconut oil
- 1/3 cup maple syrup
For the chocolate layer
- 1 cup cottage cheese such as Good Culture brand
- 1/4 cup maple syrup
- 1 teaspoon vanilla extract
- 1 cup almond flour
- 1/2 cup raw cacao powder or cocoa powder
- 2 tablespoons melted coconut oil
For the peanut butter layer
- 1 cup creamy peanut butter
- 1 8-oz package of cream cheese softened to room temperature
- 1 cup powdered monk fruit or powdered sugar
- 1 cup coconut whipped cream see note
Instructions
- Make the crust. In a large bowl, whisk together the melted coconut oil and maple syrup until blended and creamy. Add the Empower Bar baking mix and use a large spatula to stir until a dough is formed. Using your hands, gather the dough into a ball. Wrap the dough in plastic wrap and place it in the refrigerator for 15 to 20 minutes. *Don't skip this step! Without the egg to bind, the coconut oil will chill in the fridge and create a natural binder.
- Preheat the oven to 350 degrees. Spray a pie plate with cooking spray. Once the dough has chilled, use your hands to press the dough evenly into the bottom of the pie plate and up the sides, fixing any cracks along the edges. Pre-bake the crust for 15 minutes, and allow it to cool, at least 30 minutes to 1 hour.
- Once the pie crust has cooled, make the chocolate layer. Combine the cottage cheese, maple syrup, and vanilla extract in a blender and process until smooth. In a separate mixing bowl, combine the almond flour and cacao powder. Add the coconut oil and cottage cheese mixture. Stir until a thick dough is formed. Spread the chocolate layer evenly in the pie plate with the pre-baked crust.
- Make the coconut whipped cream. Place a medium bowl in the freezer for 10 minutes. Spoon the coconut cream into the mixing bowl, draining any of the coconut water, reserving it for another use. Use a hand mixer to beat the coconut cream on high speed until fluffy, about 1 minute. Add the maple syrup and vanilla extract. Beat again for 30 seconds. Transfer it back to the refrigerator until ready to use.
- Make the peanut butter layer. Using a hand beater or hand blender with the whisk tool, beat the peanut butter and cream cheese in a large mixing bowl until blended and fluffy, about 1 minute. Add the powdered monk fruit and beat again. Fold in the coconut whipped cream until all the ingredients are blended together. Spoon the peanut butter mixture into the pie plate on top of the chocolate layer. Transfer the pie plate to the refrigerator and allow the pie to completely chill and set, at least 2 hours before serving. For best results, make this pie the day before you plan to serve it to allow it to chill overnight.
Notes
Coconut Whipped Cream recipe
Empower Bar Baking Mix
Prep Tips:
- Place your can(s) of coconut milk or cream in the refrigerator the night before you plan to make this recipe.
- Pull the cream cheese from the fridge 30 minutes to one hour before making the peanut butter filling. It needs to be brought to room temperature before it gets whipped together with the peanut butter.
- Stick a metal bowl in the freezer ten minutes before you plan to make the coconut whipped cream. You can make the coconut whipped cream the day before, keeping it in an airtight container in the fridge to keep it cold.